


Nov 20,2023 by July,Ove
Mastering Diamond Painting: Six Pro Tips for Newbies
After completing over 50 diamond paintings, I've distilled six specific tips to help newcomers engage with diamond painting more efficiently. I'm excited to share these insights with you, and if you're considering giving it a try, I believe these experiences will prove helpful.
I do want to emphasize that the primary goal of diamond painting shouldn't be to finish your projects as quickly as possible. Instead, the focus should be on relaxing and enjoying the craft.
1.Choose a High-quality Diamond Painting Kit
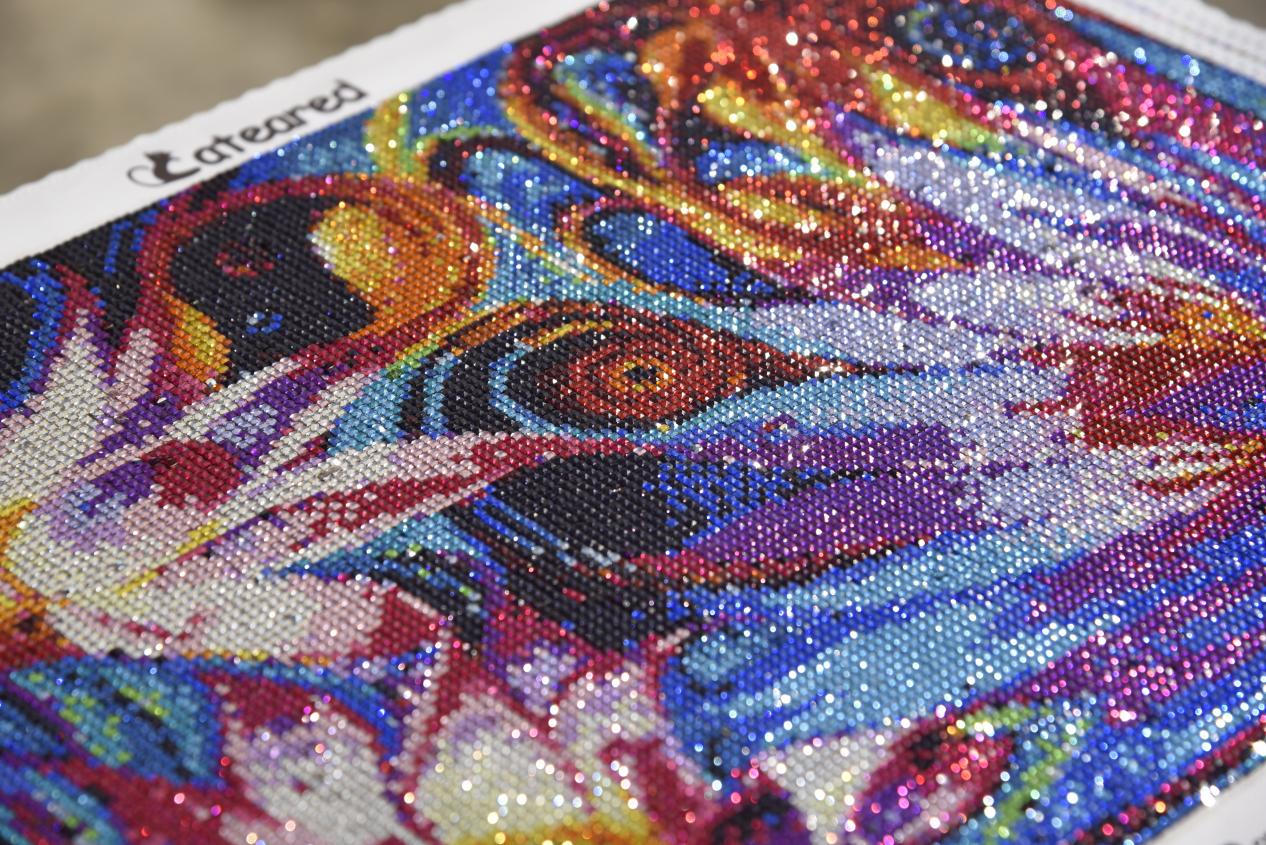
It's crucial to begin with a high-quality kit that includes superior materials. This ensures you spend less time grappling with your kit.
Actively engage in your diamond painting. This encompasses everything, from using a high-quality adhesive on the canvas that securely holds the diamonds, eliminating concerns about diamonds falling off, to factors like symbol clarity and ease of identifying and locating symbols.
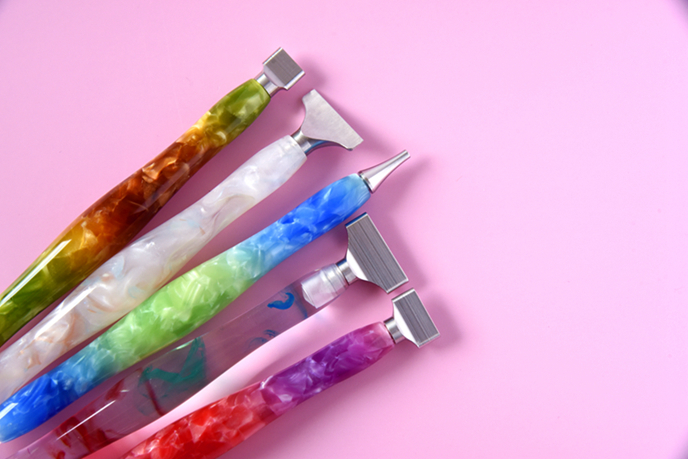
2. Opt for More Comfortable Diamond Painting Accessories
While the basic diamond painting pen that comes with your kit works fine, I recommend making a few accessory upgrades for a more comfortable experience. For instance, investing in a hand-turned diamond painting pen, such as those from Amazon Cateared or Butterfly Effect, can be worthwhile. These pens offer a more ergonomic design, providing better comfort during longer diamond painting sessions.
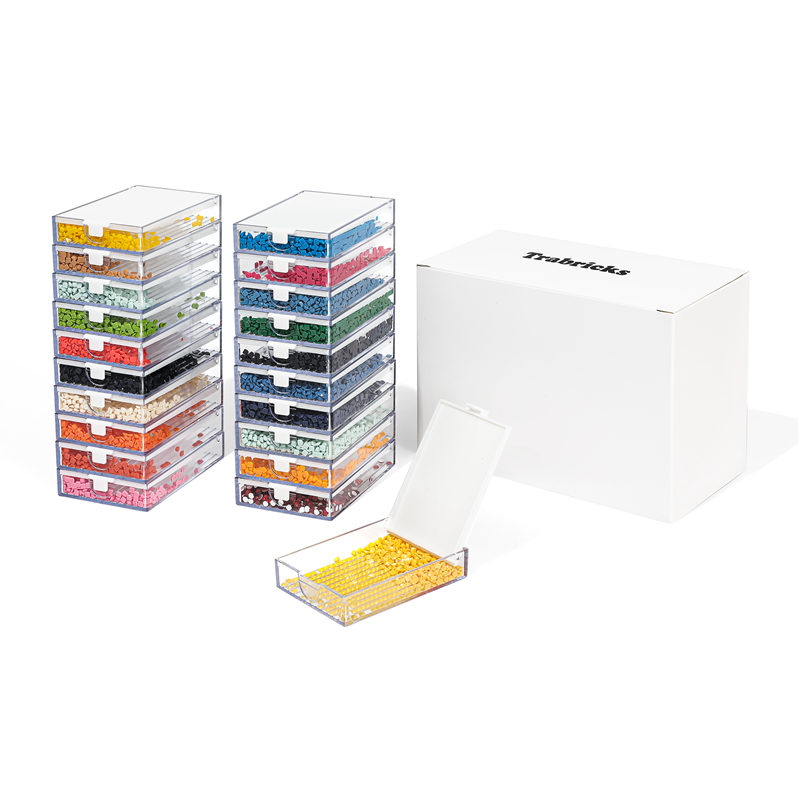
I also highly recommend upgrading from the basic tray that comes with your kit. Trabricks, from Cateared, is a great storage solution. The high-quality trays make pouring drills in and out and aligning them easy—small details that can save a lot of time. Additionally, it serves as a storage box. When not in use, simply cover it, eliminating the need to transfer drills to a storage box or drill bag. It's both a time-saver and a cost-effective choice compared to other 3D printing trays.
Having all your materials neatly laid out in a tray in front of you is undoubtedly a time-saver. Upgrading these accessories can significantly speed up your diamond painting process.
3. Create a Comfortable Workspace
Many people find it enjoyable and preferable to work on an angled surface. You can invest in small, angled desktop tables for a more ergonomically comfortable experience, benefiting your back, shoulders, neck, and hands. It's essential to determine what your body needs to be most comfortable. Some individuals also appreciate having a comfortable chair for their diamond painting. Listening to your body is crucial because any physical discomfort during diamond painting can significantly slow you down.
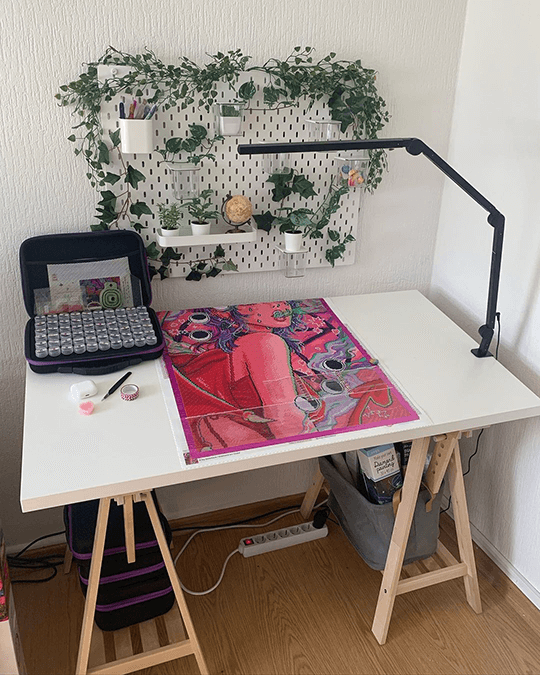
photo from @reality_diamonds.
4. Divide Your Canvas into Sections
Segmenting your canvas can be instrumental in creating a sense of accomplishment, tracking progress, and managing the overall task of diamond painting. It provides natural stopping points, offering an excellent opportunity to take a break, stretch, grab some water, or step into sunlight after completing a section.
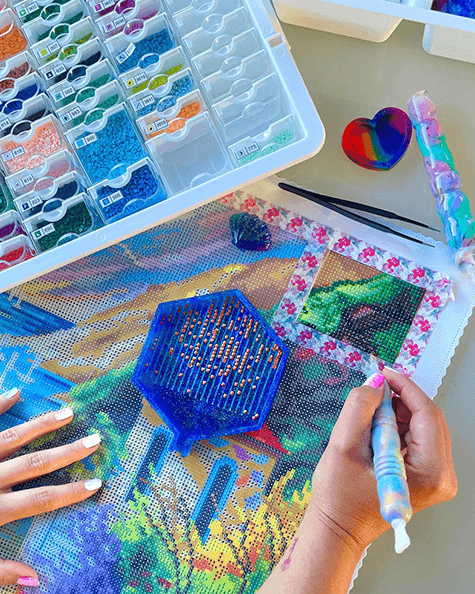
photo from @izzie diamond painting.
A high-quality washi tape, such as the one from Simply Gilded, tends to adhere well to the plastic cover. I'll usually pick a section (sometimes I use a measuring tape for precision, but it's not always necessary), mark it off, and then use scissors or a ceramic pen to cut or fold back the plastic cover. This clearly defined section not only makes the task more manageable but also brings a sense of accomplishment upon completion.
5.Utilize a Multi-Placer
Placing multiple diamonds at once with your multi-placer is a great way to accelerate your diamond painting process. With a multi-placer, you can place not just one diamond at a time but several, making it a highly efficient that saves a considerable amount of time.

photo from @dots.and.drills.
While it may take some practice, especially if you're new to this technique, it's worth the time investment. I personally use a metal multi-placer known as 'Forever Tips' because plastic multi-placers tend to develop grooves over time, whereas metal ones do not.
Incorporating a multi-placer into your diamond painting routine can significantly enhance your speed. Even if you don't get the hang of multi-placing perfectly at first, you can always go back and make adjustments with your single-placer as needed.
6.Practice Makes Perfect
Practice truly is the key. Many of these efficient habits and techniques in diamond painting develop over time through continuous practice and muscle memory. We all have different amounts of time to dedicate to this craft, so part of improving your efficiency will come from the actual time invested in the craft.
If you're just getting started or only occasionally engaging in diamond painting, it might be a bit challenging to adopt these speedier habits. However, with consistent practice and dedication, you'll find that many of these techniques will become second nature over time.